
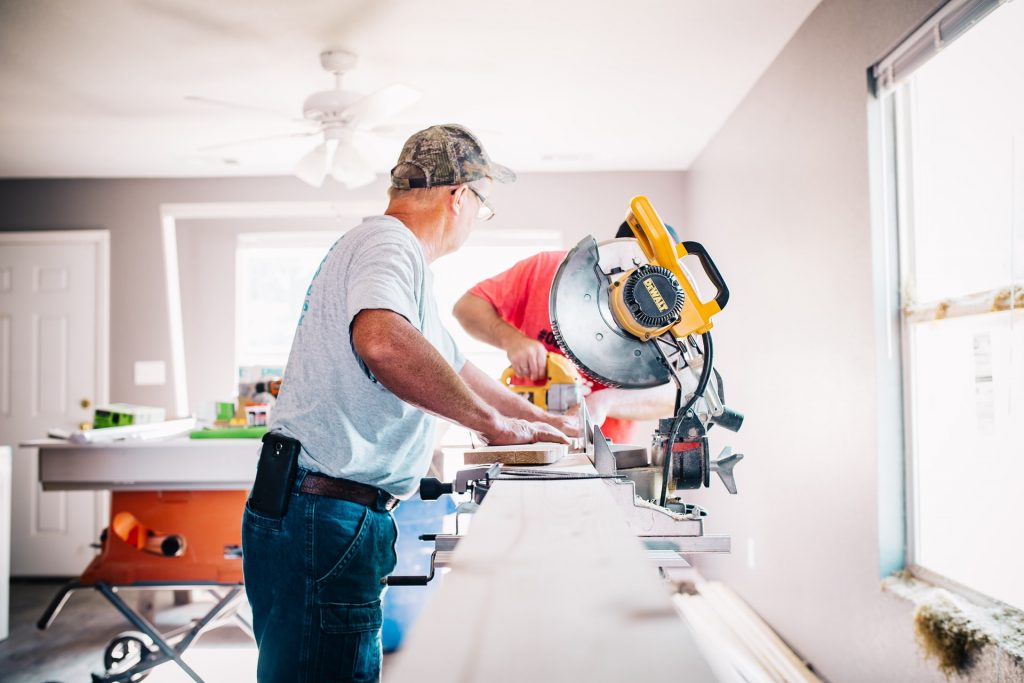
If you are a professional carpenter or even a hobbyist, you likely own a miter saw. However, a miter saw blade is not made to last.
Many beginners get overwhelmed when they try to replace their blades. But, we’re here to tell you that it is not a difficult task.
Read this guide before you start your project to prevent any unwanted accidents.
Quick Summary
In this post, we will go over:
- Why should you change the miter saw blade?
- How to check if your miter saw blade is dull?
- How to change the blade on a miter saw?
- How to choose a miter saw blade?
Let’s get on with the article.
Why Should you Change the Miter Saw Blade?
First of all, if you have a dull saw blade on your miter saw it can severely damage the material you’re working on.
Other times, the blade might simply not fit the miter saw application causing you to change the blade to a more appropriate one. For example, a 10-inch miter saw uses larger miter saw blades.
Moreover, there are different types of blades to cut different materials. If you want to cut metal, you need a special blade designed for this purpose.
There are also different blades to cut the same type of materials. For example, the 10-tooth blade to cut wood and the 24-tooth blade to cut studs. Some craftsmen also change an old blade to achieve perfect finishing in their final projects.
The best part is that you don’t need professional help to change a miter saw blade. You can easily DIY with a few common tools such as a screwdriver and a wrench. Furthermore, it won’t take you more than 10-15 minutes.
Before you start, we recommend you read the manufacturer’s manual of the saw. It’s important you buy the correct blade for replacement. If you don’t have the manual, you can search online for the model of your miter saw and the blade that it fits.
How to Check if your Miter Saw Blade is Dull?
It’s a very common mistake to confuse a dirty blade with a dull one. In that case, you don’t need to replace the blade.
When you cut wood like baseboards with your miter saw, sawdust and dirt can accumulate on the wood. This can affect the efficiency of the blade and you might think the blade has gone dull.
If you don’t regularly clean your blade, it may start to corrode. You can use special cleaners called saw blade cleaners to cleanse the blade.
However, before you check or clean your blade, you must disconnect the machine from the power. Carefully remove the blade guard, but don’t start to clean the blade when it’s in position. Safely remove the blade from the saw before cleaning.
After you’ve thoroughly scrubbed the blade, reinstall it and your blade will be as good as new (as long as it’s not damaged).
If your blade is damaged, for example, if you notice broken teeth then you definitely need a new blade as cleaning them won’t help.
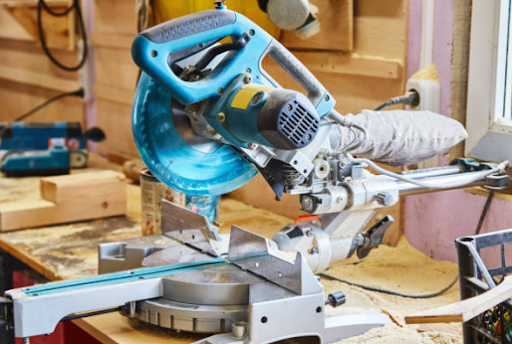
Different Parts of a Miter Saw - In-Depth Guide
Before we move on to change the blade on the miter saw, you should familiarize yourself with some parts of the miter saw.
While installing a blade on a miter saw, the main parts you concern yourself with are:
Blade Guard
The blade guard rests on top of the saw blade and acts as a cover to avoid any accidents.
Note: After you make the first cut avoid any contact with the blade because it’s very sharp and it gets very hot. Always make sure that your blade guard is working smoothly after you replace the blade.
Bracket Screw
This holds the blade arm and the blade guard together.
Spindle Lock
As apparent from the name, the spindle lock is used to lock in the spindle mechanism after it is pressed.
You have to hold this button when you’re unscrewing the blade screw because it stops the blade from freely rotating on its own.
Blade Screws
The main screw on miter saws is the blade screw. You have to access it first to detach the blade.
Note: The blade screw on the miter saw has reverse threads. This means you have to rotate the blade clockwise (right) to loosen it and anticlockwise (left) to tighten it.
Safety Instructions and Other Tips
- In any case, don’t forget to disconnect the saw before changing the blade
- Wear gloves to safeguard your hands as saw blades are extremely sharp
- Secure the blade so it doesn’t rotate once the screws are loosened
- Lock the device. If there is no locking mechanism place a small elongated piece of wood between the blade and the guide plate
- Remember to tighten the screws after you have changed the new blade. Poor fastening of screws can be life-threatening.
- Don’t forget to read the instruction manual for your compound miter saw.
- If needed, ask for expert help to avoid any issues
Things you Need to Change a Blade on a Miter Saw
- Wrench or socket set
- Phillips head screwdriver
- Safety goggles
- Gloves
How to Change the Blade on a Miter Saw?
Step 1
First and foremost, unplug the machine and wear protective goggles and gloves.
Step 2
Remove the spindle cover. You can do this if you start by rotating the blade guard to the right and then take out the front screw from the spindle cover. Allow the spindle cover to pivot back on the screw and drop back to the back screw.
Step 3
Now that the blade guard is out of the way, hold the spindle pin lock to completely lock it. If you are unable to fully lock the spindle lock, rotate the spindle with a 10mm wrench while applying slight pressure.
Step 4
While pushing the spindle lock, use a 10mm to remove the bolt. Remember that this is a left-hand thread bolt. This means you will have to rotate it to the right (clockwise) to loosen it.
Now, you can remove the outer washer of the blade. You carefully remove it using your hands. Since there is no need to remove the inner washer, let it remain in place.
Step 5
Now, you can go ahead and safely replace the saw blade. Clean the oil from the inner and outer washer. While replacing the blade make sure its teeth are facing downwards. Also, remember to follow the directions arrow printed on the saw blade to install it in the right direction.
Once you have attached the blade properly, place the washer back on and tighten the bolt (the bolt will move left to tighten). You can use a 10mm wrench for this,
Carefully use your fingers to check if it’s properly attached. Then, use a screwdriver to tighten the spindle cover screw and lower the blade guard.
Step 6
Double-check to see if the blade is firmly attached. To avoid any accidents, be extra cautious throughout the whole process.
Learn more with our various RESOURCE GUIDES.
How to Choose a Miter Saw Blade?
The first thing you need to do is consider the material you’ll be working with. There are no universal blades. Each blade has a specific purpose, so you have to get the right one for the right job.
Now, to the more complicated part. There is a huge variety of miter saw blades in the market. They all depend on the type of cut you want. For example, you can’t use the same blade to cut a 4×4 post as you would use to cut a specific section angle iron.
The good news is, you don’t need to be a specialist to determine the right type of blade. All you need to do is look at the number of teeth on your blade.
To explain this further, the blades with teeth will result in choppy and rough cuts. Whereas, blades with more teeth make more precise and accurate cuts.
So, if you’re looking to make handmade furniture, we would recommend you to use a blade with more teeth. But, if you want to cut studs or chop a large quantity of wood without caring for details, use a blade with fewer teeth.
Moreover, if you want a more pocket-friendly blade, we recommend the steel blade. They are not only cheaper but reliable to cut softer wood.
However, do not use them on the hardwood as they might go dull. For hardwood, you’ll need a high-speed steel blade.
Lastly, If you want a blade for detail, precision, and smoothness, we would suggest the carbide-tipped blades. They are a little pricey but they’re long-lasting and they stay sharp.
How to Choose a New Blade According to its Teeth?
As we mentioned before, it’s important to learn how to change a blade. But, you also need to know the difference between blades with different amounts of teeth.
At the beginning of the article, we said that a compound miter has 24 and 100 teeth. The miter saw with 24 blades is used for ripping wood. If you want a power saw for crosscutting, you should go for a miter saw with 60-80 teeth.
Keep in mind that rip blades aren’t smooth but, they can cut hardwood without any problem. On the other hand, crosscut blades are smoother and don’t cause any tears.
But, you’ll have to slowly feed the saw since they apply more individual cuts. We would recommend them if you’re after details in your work.
How to Choose a Blade According to its Teeth Mark?
There are different names for blades with different teeth marks. This might get confusing for an amateur craftsman.
But, you don’t need to panic since we have compiled a list of the marks and their meanings:
- A triple chip grind (TCG) is used to cut hard and heavy materials
- Alternate top bevel (ATB) can alternate between the left and right bevel with extremely smooth and clean cuts
- The high alternate top bevel (Hi-ATB) is to crosscut. They can also cut materials with melamine surfaces.
- Saws with flat top (FT) blades are very versatile. They can rip both soft and hardwood and quickly remove the material.
- The combination tooth (comb) is also very versatile. You can use it to crosscut and rip wood.
How to Choose a Blade According to the Hood Angle?
This is the last thing for you to consider. Hook angles are very important as they determine how the blade works. They tell you if the face of the teeth is facing to the front or the back.
The teeth facing to the front have a positive hook angle, in the direction of the rotation. The negative hook angle teeth face away from the rotation.
This makes the negative hook angle slower but more precise. Positive hook angles produce quicker and more aggressive cuts.
How to Change the Blade on a Miter Saw - Conclusion
Now you know how to successfully change a blade on your compound miter saw. Don’t forget to take good care of your blades so you don’t have to change them so often.
Furthermore, you have also learned about the different kinds of blades, blade teeth, marks, and so on. All of which is relevant when picking the suitable replacement miter saw blade.
We hope this guide was helpful. If you have any questions, leave them in the comments below. Visit our website.