
If you want to add extra shelving to your kitchen or redo your closet, you’ll need to cut down laminate veneer particle boards.
A circular saw is a great tool for the job. All you need is to use the correct blade and take the necessary steps to prevent chipping.
We will teach you everything you need to learn to cut laminate shelving with a circular so you can do the job safely and efficiently.
Quick Summary
In this guide, we will go over the following points:
- What is laminate shelving?
- Why should you use a circular saw to install laminate shelves?
- How to cut laminate shelving with a circular saw?
…and more.
So, without further ado, let’s get started.
What is Laminate Shelving?
Laminate shelving is a great alternative to wood. We love it because it’s not only affordable but also very easy to install. You don’t need any special tools or finishing.
You can find these shelves in a variety of shapes, sizes, and thicknesses. It all depends on the manufacturer. Some shelves have a smooth laminate finish on both sides, while others can be customized with a laminate shelf insert on the back.
We will show you a step-by-step guide on how to install these shelves further in the article.
Why Should You Use a Circular Saw to Install Laminate Shelves?
Whether you’re a professional carpenter or a DIYer, we’re sure a circular saw is a staple in your toolbox.
They’re extremely versatile with a good blade that can cut through almost any material. They’re also cheaper and a safer option as compared to table saws and jigsaws.
Moreover, they have the following advantages:
- Portability
- Accuracy
- Models for both left and right-handed users
- Can make bevel cuts, plunge cuts, miter cuts, and more with a single saw
- Fewer chances of kickback
How to Choose the Correct Blade?
Most of these shelves are particleboards with a type of laminate called melamine veneer. So, to cut these boards neatly, you need the correct blade.
To make things easier for you, we’ve compiled a list of things you should look for:
- Minimum of 80 teeth
- Carbide-tipped teeth
- Hollow ground
- Thin kerf
- Negative hook angle
Go with a blade with a high tooth count. A higher tooth count takes smaller bites so it cuts smoother. Although we recommend a blade with 80 teeth, 100 teeth will give you an even finer cut.
Moreover, carbide-teeth blades are an absolute must. They’re harder and more durable than steel bodies so the cuts are more crisp and clean.
Hollow ground blades will help you cut through the laminate instead of hacking it. This is because the teeth have sharp edges so the angles are less than 90-degrees.
If you’re unfamiliar with what kerf is, it’s the width of the blade teeth and the width of the space left behind.
You want to go for a blade with a thinner kerf. It means less material is wasted. Moreover, the negative hook angles help to slow down the feed rate which will give you a better handle on the cut.
Note: To DIY easily make sure to have all the tools with you.
How to Cut Laminate Shelving with a Circular Saw?

Now that you have some basic knowledge of what laminate shelving is and the right blade for it, let’s move on to how to cut the shelving.
Step 1 – Sand both sides of the laminate shelves
This process is called scuff-sanding. It’s an important step to prepare the laminate for installation.
This will not only remove the glossy sheen on the board but form microscopic grooves on the surfaces. These grooves help create a stronger bond so it doesn’t peel over time.
Step 2 – Position the work area
We recommend you do this project outside since you need a lot of space to move around. An open deck, patio, or driveway will work best.
Furthermore, since you’ll need to make dangerous cuts, find a location that can accommodate large pieces of scrap wood.
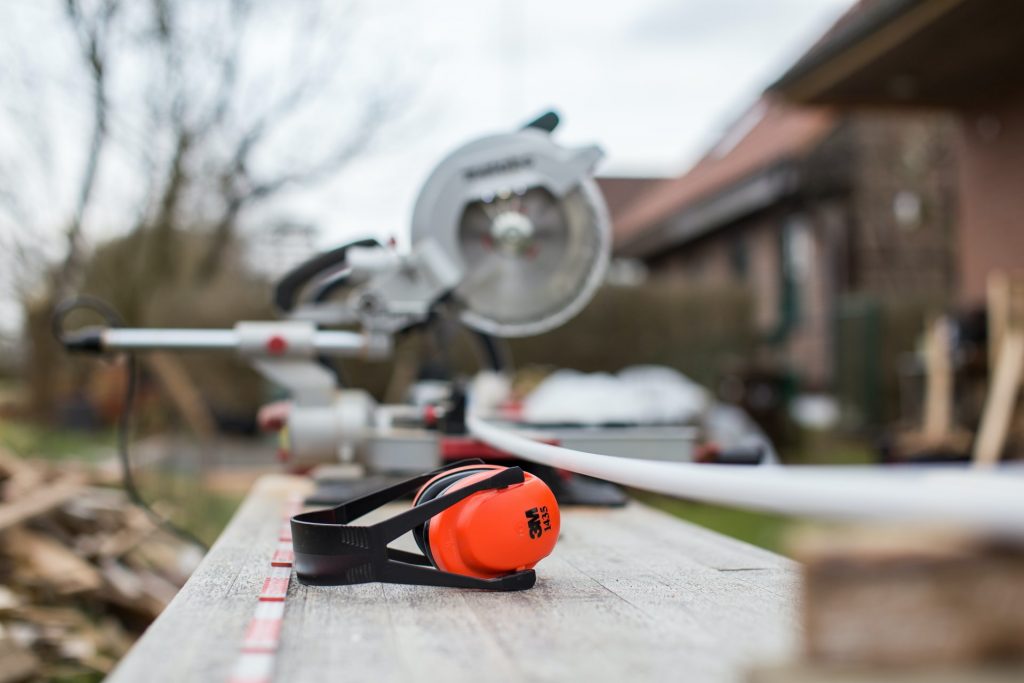
Don’t forget to follow the safety precautions while you operate a power tool such as a circular saw. Not only are the blades extremely sharp but you also need to protect yourself from the silica dust produced.
Safety goggles, a good quality respirator, and gloves are a must. Also, make sure there are no children or pets around as you work.
Step 3 – Measure and draw the cut lines
As we said before, use a carbide-tipped blade to prevent breakage or chipping. This happens when the laminate bends before the saw cuts through the material. A cut line will help avoid this.
Measure and sketch a cut with chalk or a carpenter’s pencil. Then, carve out the line with a utility knife.
Step 4 – Adjust the circular saw and make the scoring cut
This step is essential as it will help you get the cleanest cut.
Choose which side of the shelf will face outwards, then flip the side to the bottom. You will make the scoring cut on the other side.
Next, place some painter’s tape on top of the cut line. Then, sketch over the line you drew in the last step. The tape helps to balance the laminate on the exterior of the kerf as you cut.
Now, alter the circular saw blade so only ¼ inch of the blade is exposed. Don’t forget to wear your gloves.
Connect your saw to power and let it come to speed. Carefully, make a shallow cut along the cut line.
Note: Your circular saw rotates in a clockwise direction so the bottom teeth will enter the laminate first. This means you might experience chipping on the top side.
Step 5 – Make the final cut
Put masking tape on both sides of the cut line where you haven’t cut yet. Then, flip the side so it’s facing downwards.
This time, alter the saw so the blade is a little deeper than the workpiece. Make the final cut with a ¼ inch score on top.
Wrapping Things Up…
Lastly, make sure you don’t apply too much pressure as you cut the workpiece. You don’t want to force the blade.
In the end, the blade and the safety precautions you took should give you a smooth and clean cut.
As long as you follow our instructions, you shouldn’t have any difficulty cutting a laminate shelving with a circular saw.
Check out our page for more DIY projects.