
Miter saws work wonderfully when you have to cut and trim baseboards. However, you need to know how to operate them in order to get the best results.
With baseboard, it’s all about practicing the correct techniques. You can’t expect to be perfect straight off the bat.
However, reading about the appropriate techniques and effectively exercising them during woodwork can help you on your journey to achieving clean cuts.
Quick Summary
In this post, we will provide step-by-step instructions on how you can use your miter saw to cut baseboard molding.
So without further ado, let’s get started.
Some Safety Precautions
Before you start any project that involves sharp rotating blades, it’s important to go through some safety precautions.
This ensures that your work is done in the most efficient and safe manner. We highly recommend that you set some time aside before you start any project to ensure everything in the environment is safe.
Some safety precautions you should take before working with a miter saw include:
- Wear safety goggles while using a miter saw. You don’t want the fast-flying debris and timber to get into your eyes.
- Avoid any loose clothing. Make sure everything is tightened up so that nothing gets caught in any moving parts. If you have long hair, make sure to tie it up before the operation.
- Before you actually place the workpiece on the board, ensure that the miter saw is turned off and there’s no power flowing to it. Only turn it on once you are completely ready to use it.
- Try to have a well-ventilated workspace. You don’t want to work with timber in an enclosed space as you can breathe in a lot of sawdust and timber.
- If you can’t have a well-ventilated space that’s safe enough, make sure that you wear some sort of breathing mask to protect yourself.
- When operating the saw, make sure not to apply too much pressure too quickly. Gently turn on the saw and gently lower it into the workpiece. If you work too quickly, you can damage or splinter the wood. You could even damage the saw itself.
- Make sure to keep your workspace clean. After every woodworking session, it’s a good idea to vacuum the entire workspace before you start work on the next session. This increases the longevity of your tools and helps maintain a healthy workspace.
As long as you take the safety precautions listed above, you won’t run into any issues while working with a miter saw.
How to Use a Compound Miter Saw to Cut Baseboard Corners
In this section, we’ll go over the step-by-step process you can follow in order to cut baseboard corners with a compound miter saw.
If you are new to working with miter saws, this can be a great exercise to develop a feel for how miter saws cut timber.
Just follow the steps provided below and you’ll be set:
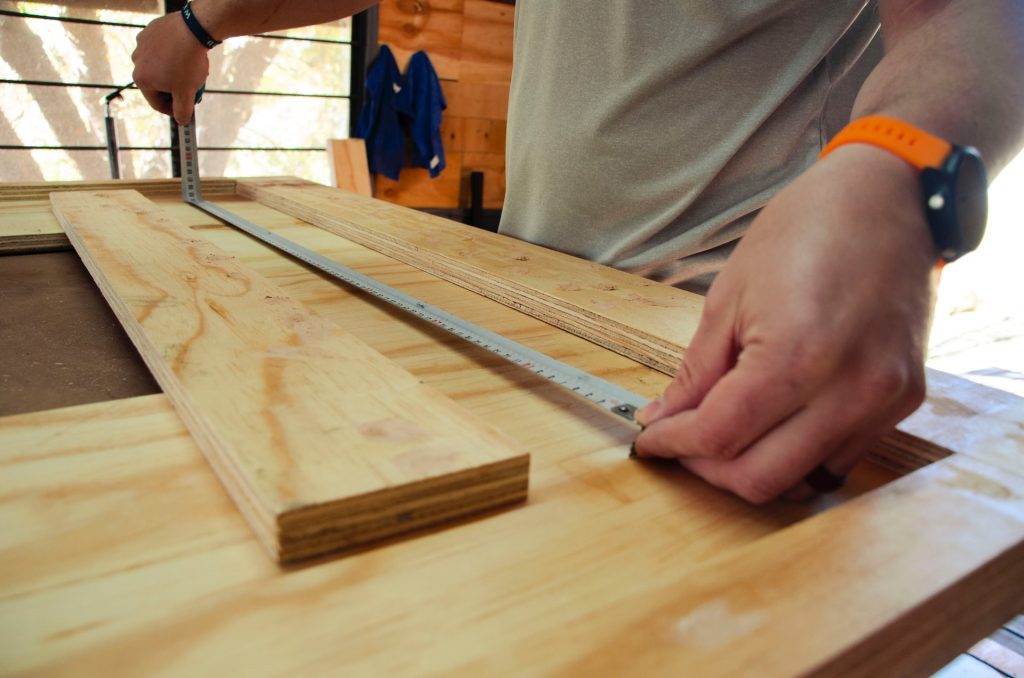
Step 1: Before you set any pieces in place or do any cutting, the first step will be to take all the necessary measurements.
For this step, your tool of choice will be your measuring tape. It’s a good idea to measure everything twice since you want to be sure you’re making the right cuts. If you cut a piece of wood incorrectly, you will just have wasted the entire piece.
Use your measuring tape to measure how long your walls are at the base. Ensure that you measure all of the walls from one corner to the next. Note down the length of each individual baseboard that you need to cut.
Quick tip: When you are performing these measurements, it can also be a good idea to look for studs in the walls and mark them.
Studs are important to find because that is what you will hammer the baseboards onto when you later install them.
You can use studs using a stud finder or by using the knocking technique and listening for the sound that returns.
Step 2: First of all, you need to focus on the inside corner cuts. Use a pencil or a marker to mark the cutting line on the back of the baseboard.
For the miter saw, you will need to set the bevel to 45 degrees and the miter to 0 degrees.
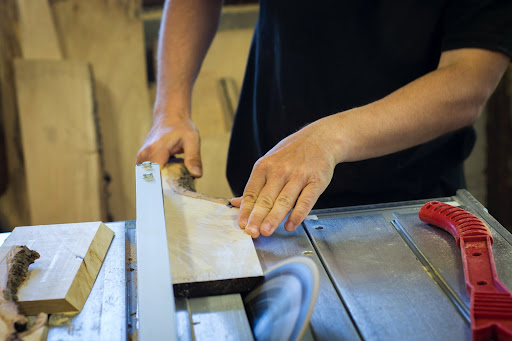
Once the miter and bevel angles are set and the baseboard is in place, you can go ahead and turn the saw on.
Hold the saw with one hand and the baseboard with the other. Gently lower the saw and push it all the way through the timber until the cut is fully made.
Don’t overpressure at this stage. Moderate pressure should be more than enough for your miter saw to push through the timber.

Step 3: For the outside corner cuts, you can have the settings at the same angle as step 2, i.e., miter at 0 degrees and bevel at 45 degrees.
According to these measurements, you will want to cut the baseboard piece so that the front side is a bit longer than the backside. This will allow you to join the individual corners with each other once everything has been cut.
This step can be difficult for novices so take your time at this stage. It’s a good idea to practice with a few scrap boards before you do it with the actual piece you want to use.
Step 4 (Optional): This step is only for people who want to make square cuts rather than angled cuts for their baseboards.
If this is the case for you, the operation will be the same but the settings for your compound miter saw will be slightly different.
The bevel will be at an angle of 0 degrees while the miter will be at an angle of 90 degrees.
It’s a simple crosscut so it’s actually easier to do than the angled cut described in steps 2 and 3.
Step 5: Once all of the appropriate baseboards and baseboard corners have been cut up, the last step is to install them to the base of your walls.
This post is mainly about how to use a compound miter saw to cut baseboard corners but we thought providing details about installation would be helpful.
To install the baseboards to the base of your walls, you will need to hammer or screw them in onto the studs inside your wall.
As mentioned above, you can identify the location of studs in your walls using a stud finder. If you can’t find a stud finder or don’t want to buy one, you can use the knocking technique.
This technique simply involves you knocking on your walls and listening to the sound that emanates from them. If it’s a hollow sound, then that means you are not knocking on a stud.
However, if you are met with a solid sound, then that means you’re knocking on a stud.
Once you’ve identified the locations, you can mark them with a pencil or marker.
Then, when you install the baseboards onto the base of the walls, you can use these marked locations to screw or hammer the baseboards in.
Make sure that you use the right length of nails to hammer or screw the baseboards onto the wall.
Most pieces of baseboard molding will use finish or brad nails. Their length should be no longer than 2 inches.
In most cases, you will use nails that are about 1 ½ inches long. That will ensure that you don’t accidentally hit any pipes or electrical wiring behind the wall.
How to Use a Miter Saw to Cut Baseboards? - Conclusion
So that’s how you use a compound miter saw to cut baseboards.
We hope you were able to get some idea of how to go about cutting baseboards using this highly effective power tool. Miter saws can be intimidating to get the hang of but they can only be achieved through practice.
Hence, practice with a bunch of scrap materials before you work on the actual piece.
If you have any more questions or confusion, please reach out to us in the comments section below.
Take a look at our website for more information on compount miter saw.