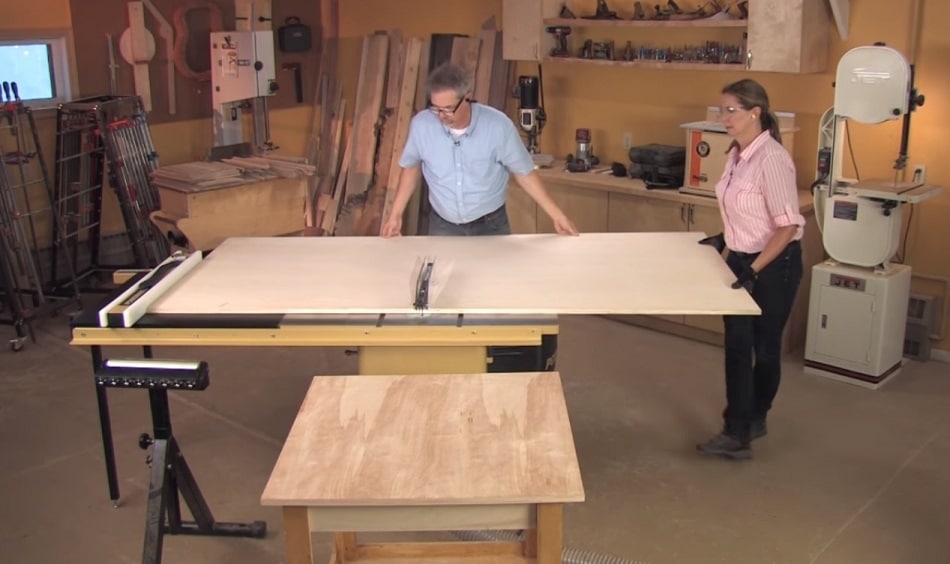
Plywood is pretty handy. This can be used for many purposes. From tables to partition boards to interior design, you can use plywood in almost every situation.
But there’s a catch-
Getting the perfect piece for a certain use is pretty tough.
That’s not all.
Cutting down plywood to a perfect shape is a bit complicated.
However, using table saws is one of the best methods of cutting plywood.
So, how to Cutting Plywood with a Table Saw?
You just have to choose the right blade, support the entire sheet and cut with the good face up.
But people often start cutting without knowing the process in detail. As a result, they sometimes ruin the whole sheet.
Don’t fret. We’re here to help you out. We have prepared a 6-step guide here to help you out.
So, let’s get going with the details- How to Cut Plywood with a Table Saw
Step 1: Choose your Blade
The equation is simple.
High tooth count = Smoother Cut
Most stock blades will give you rough cuts and good luck getting a clean edge from those. So, loosen up your pocket a bit and get a high tooth count blade such as 80TPI plywood blade.
Step 2: Raise your table saw blade
If you raise your blade, then its teeth will change direction while entering the wood.
If your blade is in a lower position, then the blade teeth enter the cutting area at a specific angle. As you raise the blade higher, you’ll start getting perpendicular cut. As a result, you’ll get a smoother surface.
Here’s the thing-
Don’t raise your blade all the way up. Keep it within 1 inch above the plywood. Raised blades can cause danger. So, while using a raised blade you should be extremely cautious.
Step 3: Start Using a Zero-clearance insert
What is a ‘zero clearance insert’?
A lot of table saws have a gap between the blade and throat plate. The throat plate is where the blade sits in the table saw. A zero clearance insert closes this gap.
As a result, your sheet gets support and you get smoother cuts.
There are two ways to get a ‘zero clearance insert’.
The first way is to buy one online or at the local hardware store.
The second way is to make one.
So, here are the steps of making a ‘Zero clearance insert’-
- Carefully put a piece of plywood onto the table saw. At this step be careful not to slip away the piece. Also, don’t let the blade pull away from this piece from your hand.
- Clamp the insert down once the blade goes all the way through. At this stage, the blade needs to be quite high.
- As the insert sets up, you can now cut on the insert. As a result, the bottom layer of your plywood now won’t chip down.
It’s suggested to make the insert only when a large amount of plywood needs cutting. However, to make safe cuts make sure that your plywood is straight and supported on the other side.
Step 4: Build Support for the Entire Sheet
Handling big plywood sheets are sometimes problematic.
Check constantly while cutting those on a table saw. Because these sheets tend to chip downwards and create an angled cut.
Moreover, without the support, you might not be able to maintain a steady feed rate. This feed rate is the speed or running wood through the saw.
So, stabilize your sheet on sawhorses or ask someone to help you hold it steady. You can also use a circular saw to break the sheet down to manageable pieces.
Step 5: Tape off the Cut Mark
Take a painter’s tape or any low adhesion tape on both faces of the plywood. This will prevent the sheet edges from splitting. Moreover, this will keep wood fibers from splintering.
You can peel the tape off slowly once you’re done with the cutting.
Step 6: Start Cutting
It’s preferred that while cutting you put the good face up of your plywood sheet. This is recommended because in this process the saw will enter the sheet from the top and exit from the underside of the sheet. And all of the tear outs and splintering happens where the saw comes out.
So, keep the good face up.
Now, it’s time for the cutting. While cutting with a table saw you have to do two things continuously. These are-
- Pressing the sheet against the fence and
- Pushing the sheet through the blade.
Your hands must be well coordinated in this step or else, you’ll have to make peace with an uneven cut.
So, let’s got through the cutting process-
- Press the sheet forward using your closest hand to the blade. Press the sheet towards cutline by using your other hand.
- As the end of the cut approaches, get your two hands on two sides of the blade.
- Finish off the cut carefully in this position.
Now, you have successfully cut your plywood sheet. Repeat the same method to cut again.
Safety Measures
Using table saws can be pretty dangerous too. Though modern tables saws have finger safety methods still you should be prepared. Here are some safety measures-
- Put on gloves and goggles.
- Look out for short circuits and blade dysfunctions.
Bottom Line
At first, using table saw might be difficult for you. But with the time you’ll be able to control more. One day you might even find out a hack of your own.
Now you know details step how to cut plywood with a table saw properly. If need read again to confirm every step you understand to Cutting Plywood with a Table Saw. Now your turn
Don’t ever forget to keep the safety measures in mind.
Good luck.
Check out more about table saws in our guides.

