
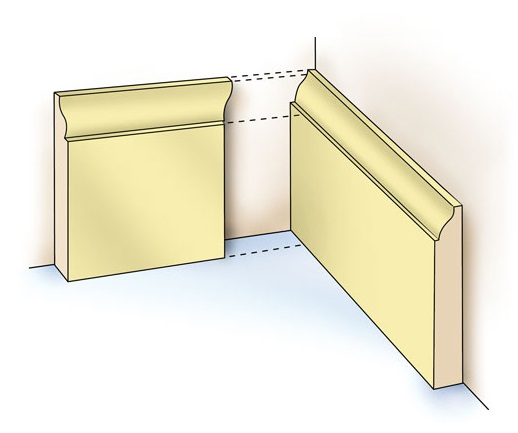
One of the main things that bring out the beauty of the room is well-cut and well-fitted baseboard skirting.
For many DIY woodwork projects, cutting corners in and out of baseboard can be difficult and time-consuming.
You don’t have to worry about that, you can make a great baseboard outside corners with a miter saw. We’ll provide you with a step-by-step guide, and some life-saving tips, so hang on.
Brief Overview
In this article, we will discuss the following things:
- How you can cut outside baseboard corners with a miter saw
- The different safety precautions, tips, and tricks you can use
So let’s get started on the basics and slowly work our way up.
What is a Baseboard Outside Corner?
Baseboard is also known as skirting or trimming and is usually made of wood, vinyl, and several other materials.
You use it to hide the joints of the wall and the floor to give it a cleaner finish.
There are two types of corners that you make with the baseboard, inside corner and outside corner.
Outside corners are typically used where two walls meet and an outward edge is formed.
It is important that the baseboard cuts that are used align and there are no gaps between their joining. Clean corners and trim are easier to install since you wouldn’t want to spend time fixing gaps in between pieces.
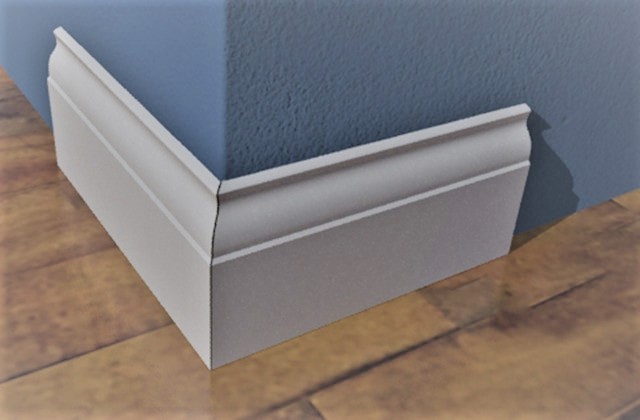
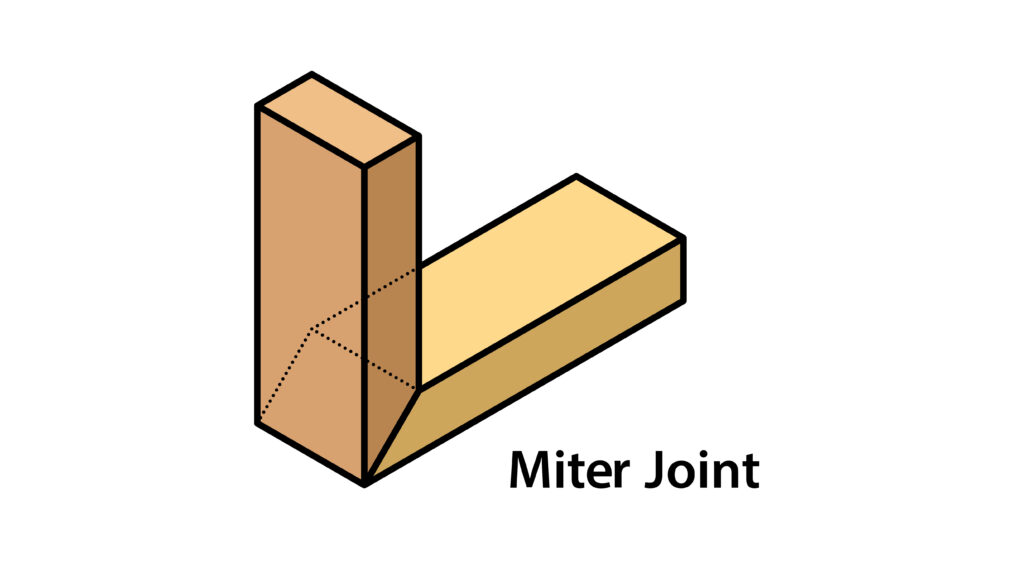
An example of a well-cut baseboard with an outside corner
The Best Baseboard Materials to Work With
Most people prefer to work with wood baseboards as they are easy to cut and mold. However, vinyl boards of PVC and medium density fiberboards can also be used.
Depending on where you live and the climatic conditions, you will be suggested a wood with moisture content and properties accordingly.
| Material | Density | Easy to Repair | Durability | Moisture Resistant | Easy to Work With |
|---|---|---|---|---|---|
| Wood | High | Yes | High | Yes | Yes |
| PVC | Low | No | High | No | Yes |
| MDF | High | No | High | No | Yes |
What kind of Miter Saw is best suited for it?
Miter saws are a very effective tool for cutting baseboards. You need to make different angles like 45 degrees, 90 degrees, and others in between.
Similarly, bevel and miter cuts are important for creating the joints of a baseboard corner.
Any sort of miter saw can be used to make a baseboard corner. We have broken down the specific ways in which the one you own can be best used for the job.
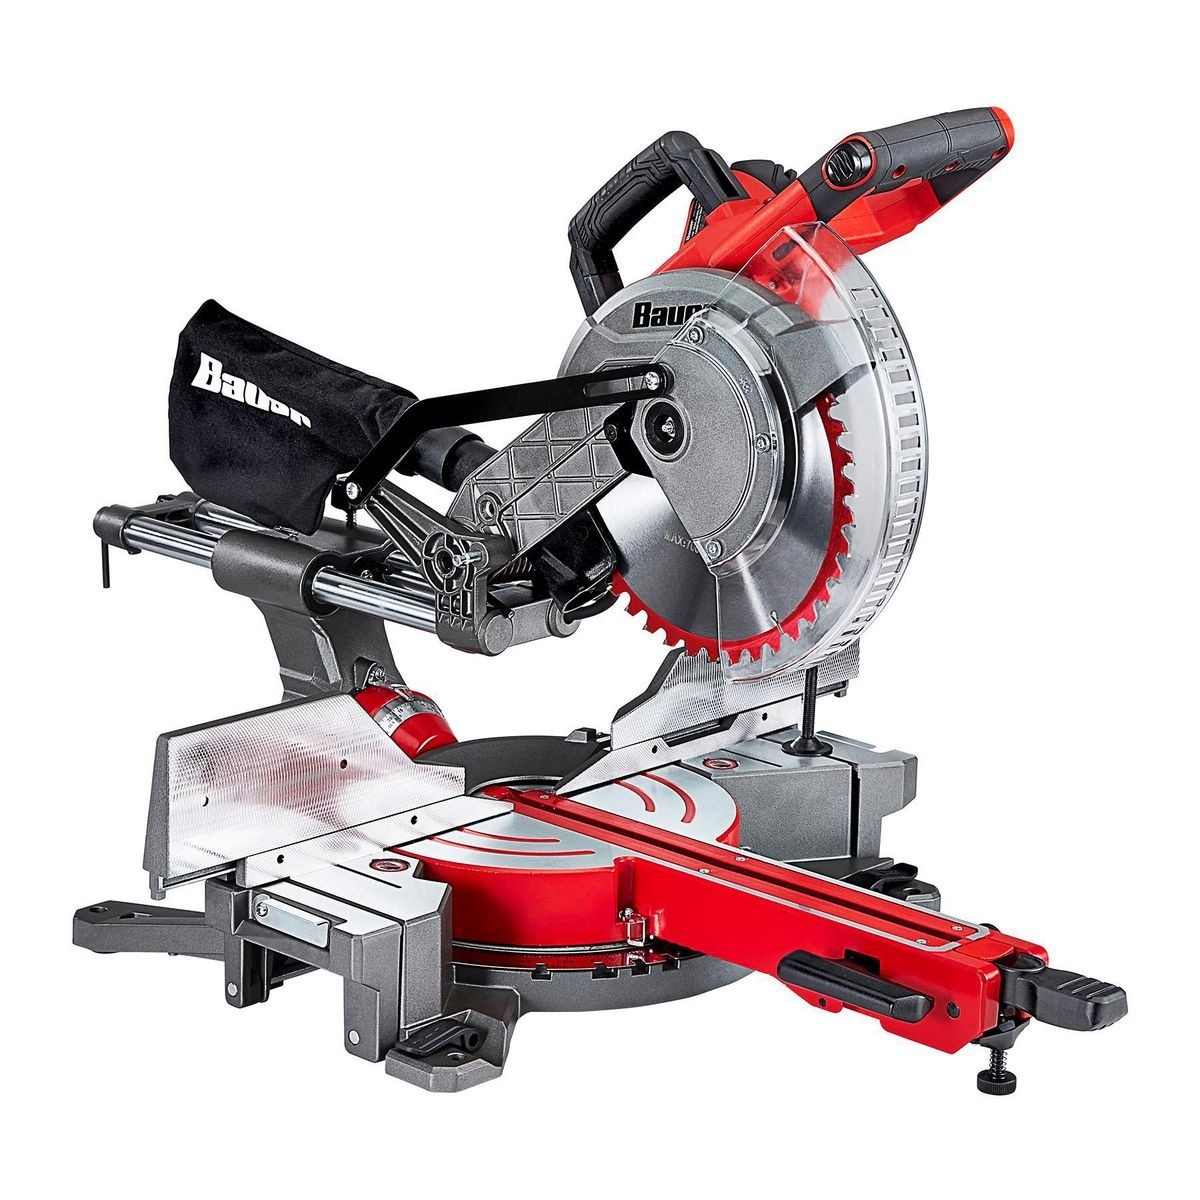
Compound Miter Saw
You will easily be able to make a 45-degree angle and others with a compound miter saw.
Bevel cuts, miter cuts, and miter angles will be easier to make as well. However, if your piece of baseboard is too long, you will have to rotate it halfway through.
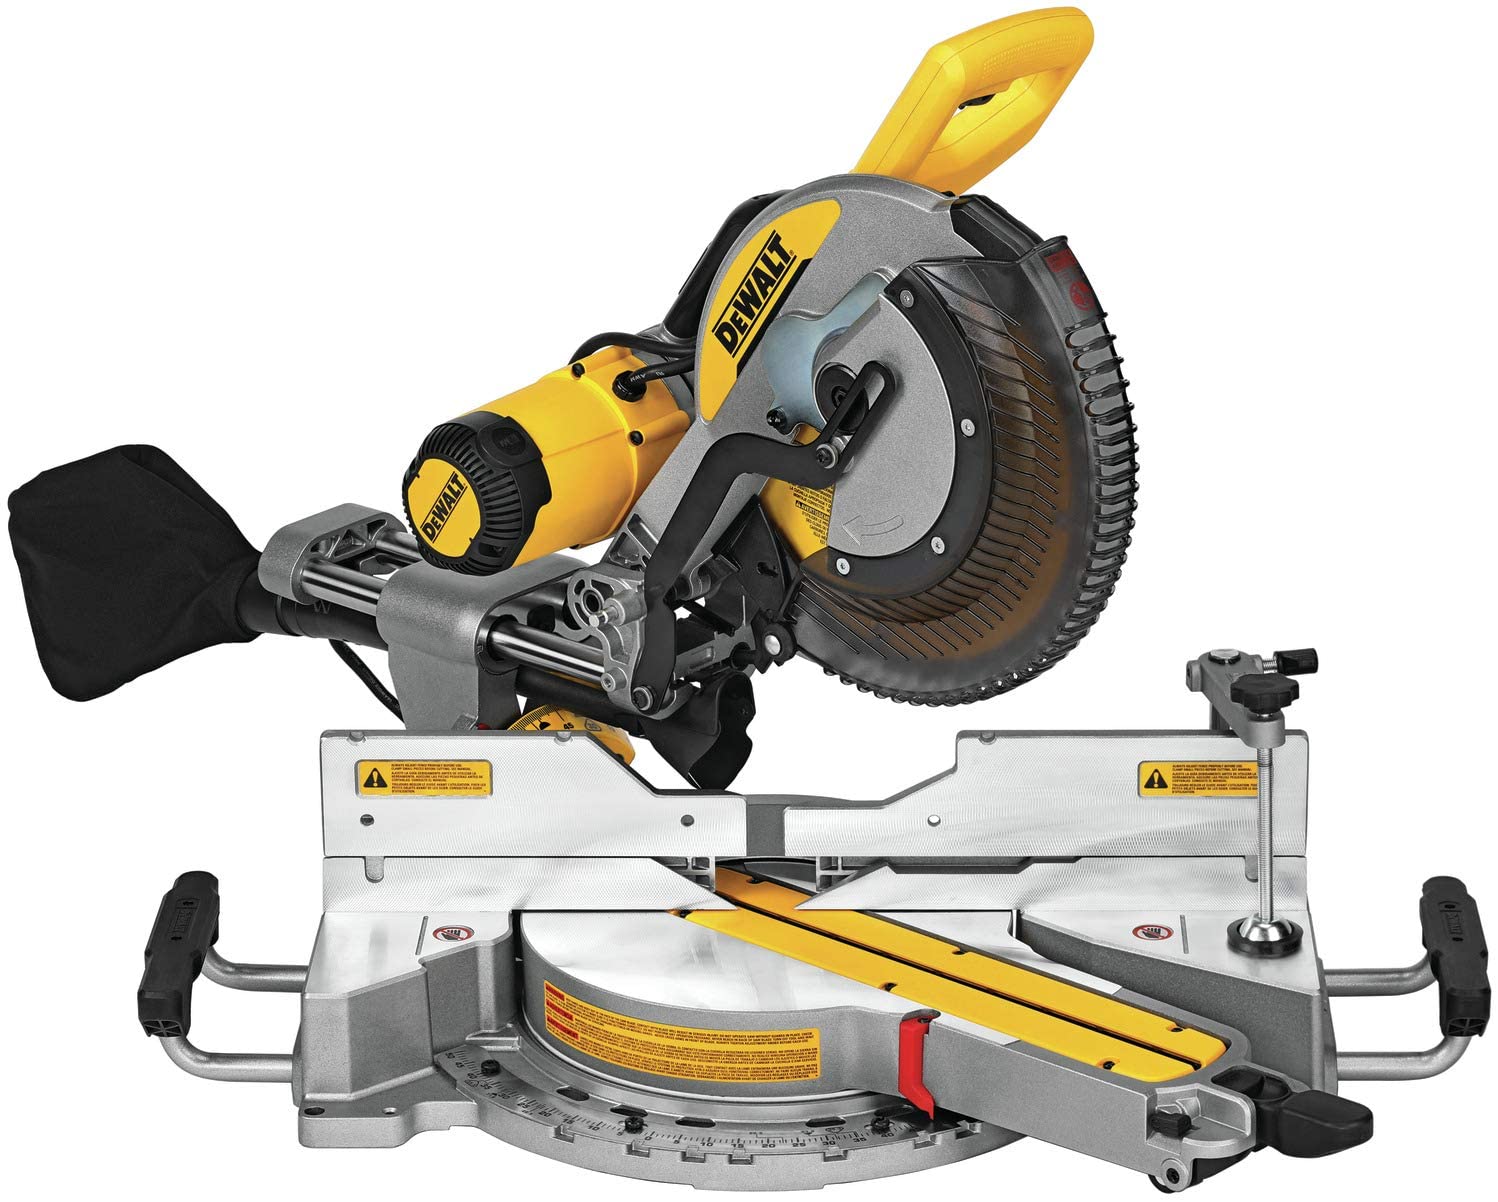
Sliding Miter Saw
Sliding miter saws come in handy when you have to cut through a long piece of baseboard in one go. Cutting the baseboard in different measurements and angles of 45 degrees, 90 degrees, etc is important for making an outside corner.
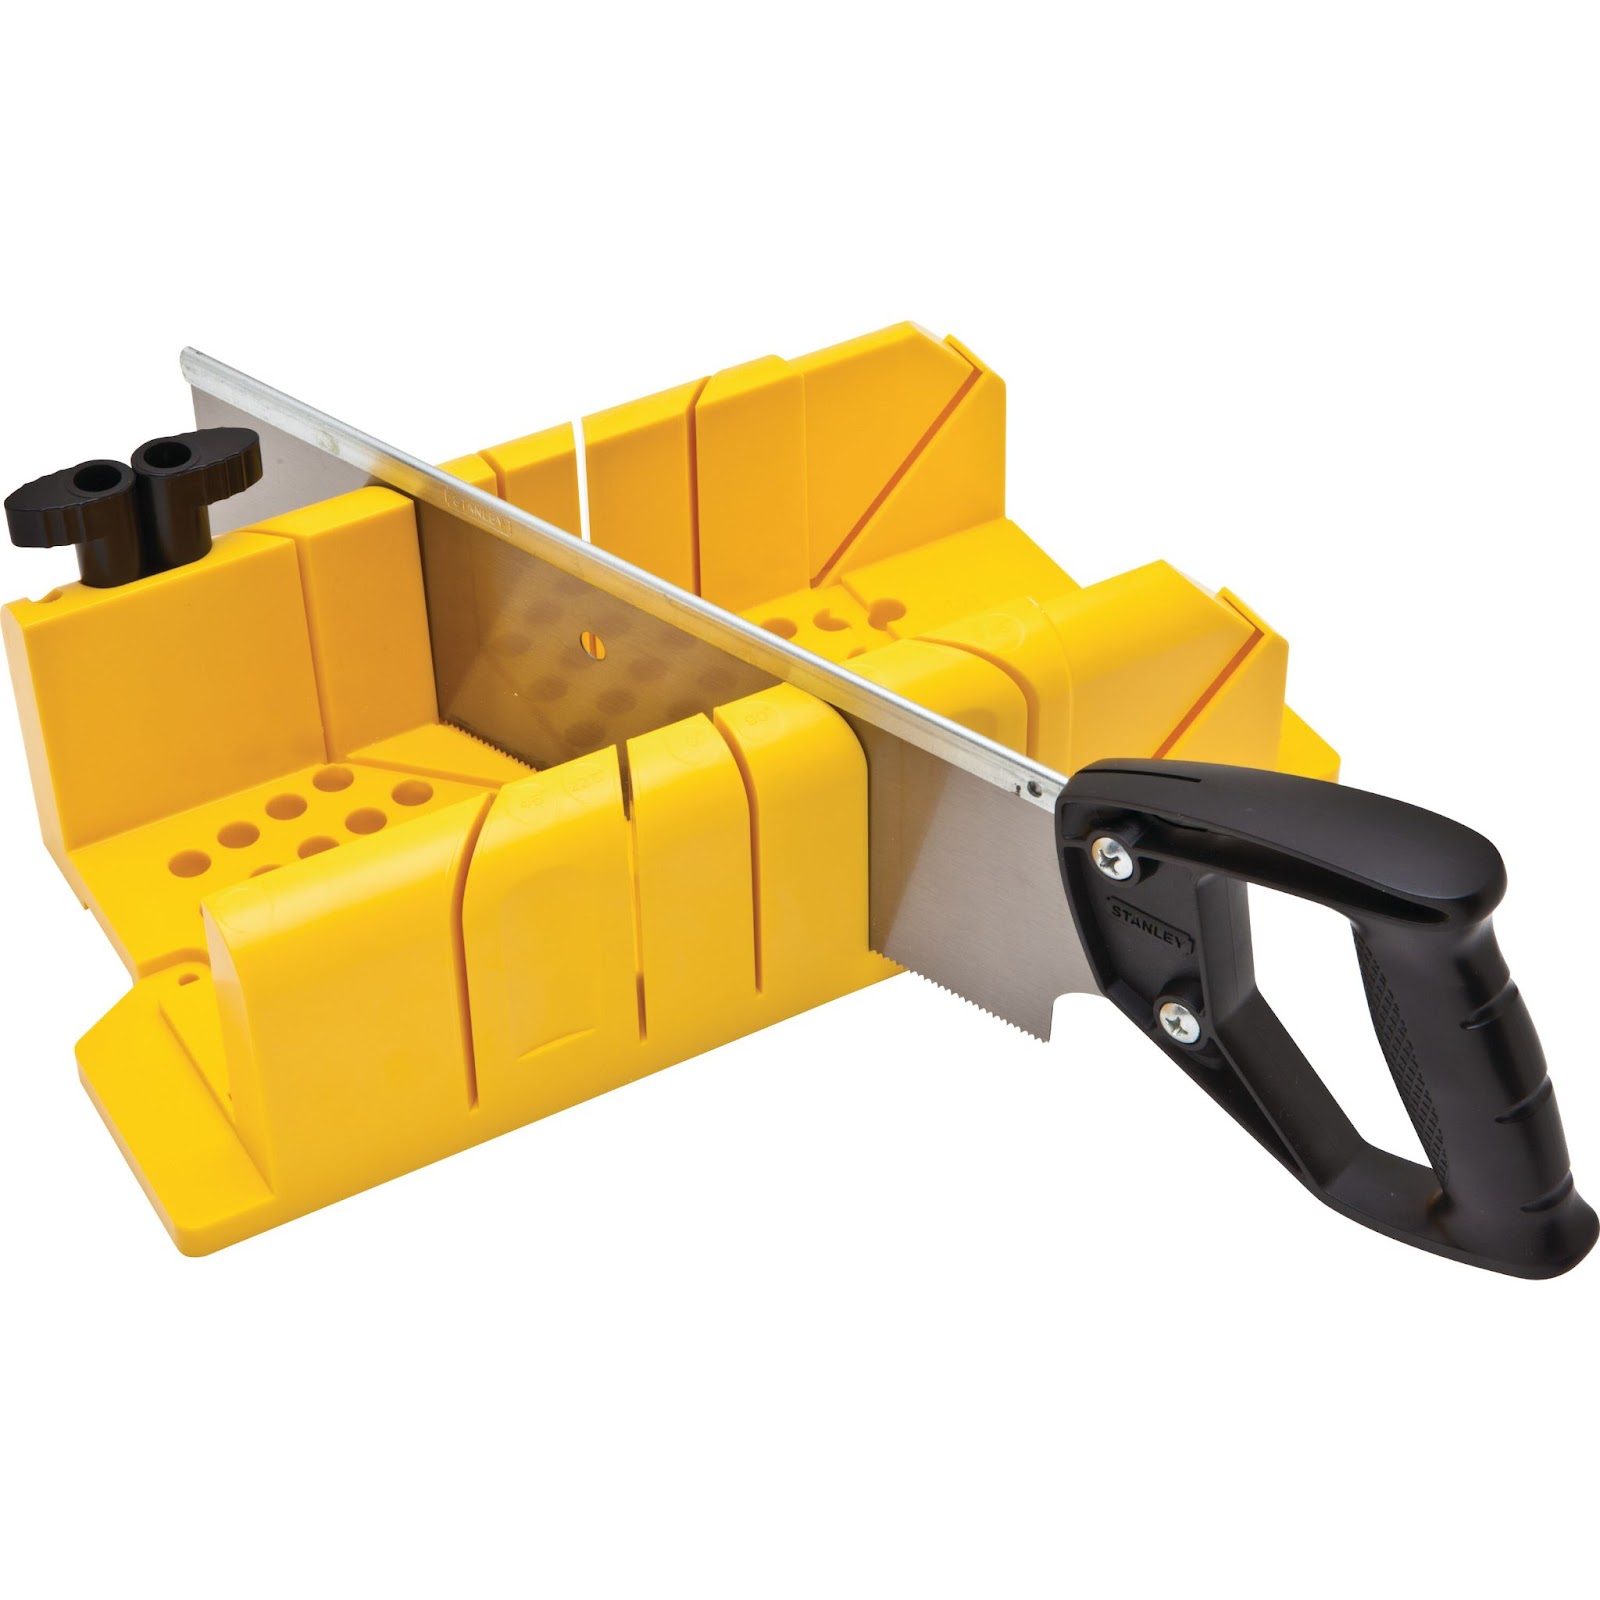
Miter Box Sets
Miter box sets are non-electrical miter saws that use hand sawing and guides to achieve desired cuts and angles. Although it will not be as quick as the electrical versions, all of the cuttings are still achievable on it.
In the end, as long as you’re using a miter saw, you’ll be able to make the desired cuts.
The Tools You Will Need
It’s always good to be prepared beforehand when it comes to gathering the tools you need. Here are the most important tools you’ll require:
Measuring Tape
You will need the measuring tape to measure the baseboard and make cuts accordingly.
Most measurements are in inches, but a dual tape with all markings is preferable.
Harder metal measuring tapes will also work as the cuts and angles are along straight lines.
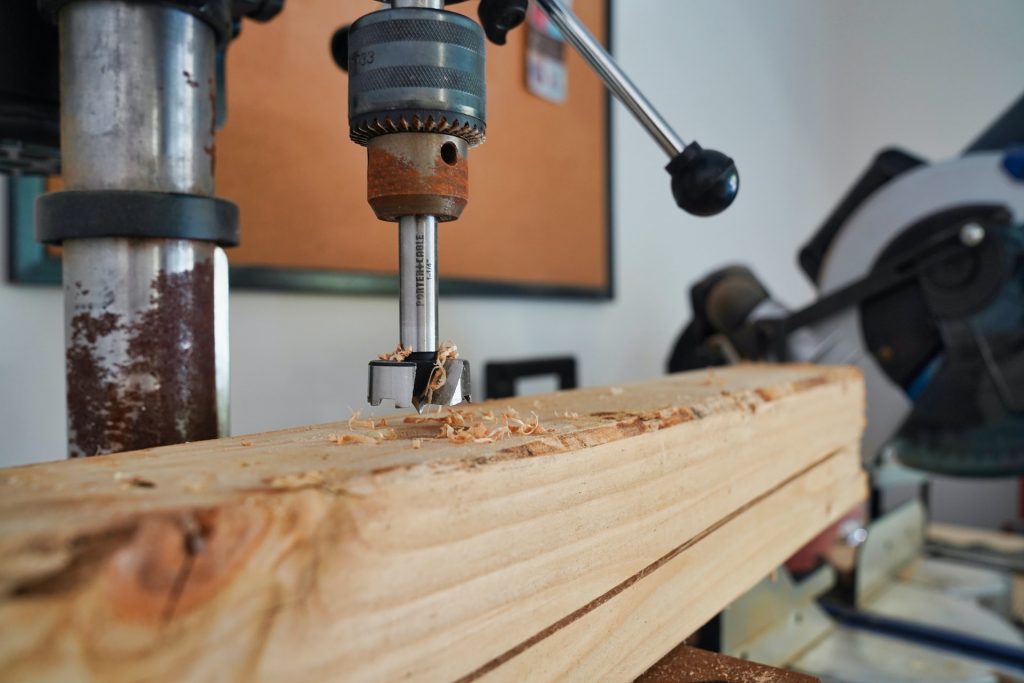
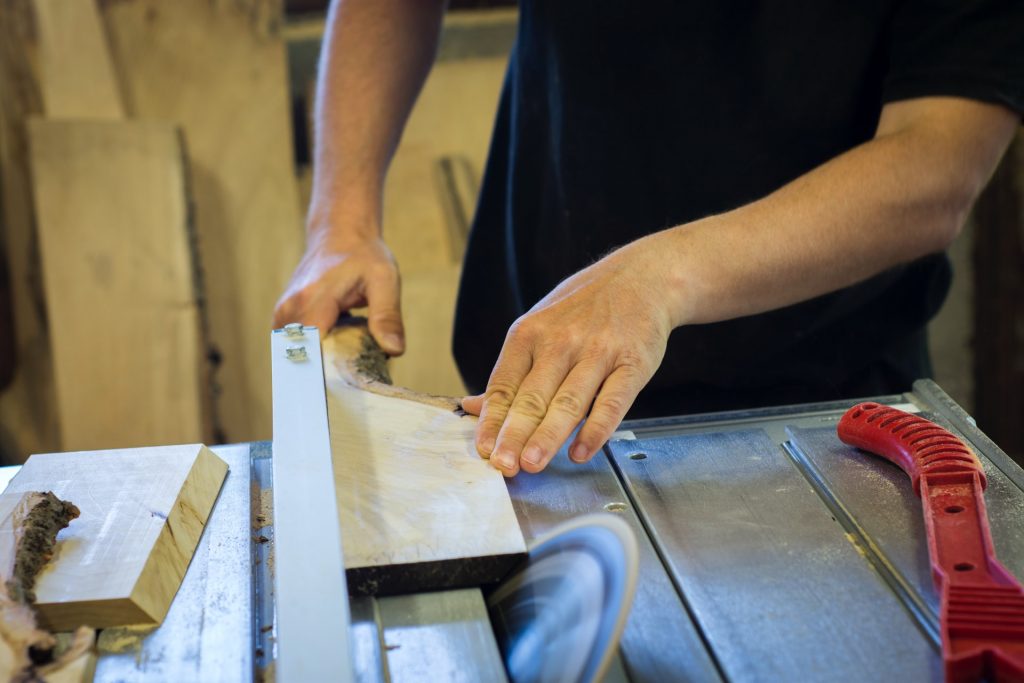
Miter Saw
The miter saw will be needed to cut the baseboard in the desired measurements and angles.
You can use a compound, sliding compound or miter box saw, the results will be the same as long as you use it carefully.
Safety Glasses
It is preferred if you have high-quality safety glasses that do not break with the impact of debris or small objects. They are to protect your eyes from dust and any fly-away pieces of the board.
Important Notice: You should always have safety glasses on when using a saw.
Dust Mask
Dust masks keep you from inhaling sawdust and coughing when using the saw. It can help protect your lungs from any irritation and discomfort. Although most people go without it, a little extra measure goes a long way.
Protractor (if available)
In case you’re a beginner who finds it hard to measure angles by sight and wants to check their cuts and ensure accuracy, you can use a protractor.
Baseboard
Finally, the baseboard itself is the most important part of the project. You can choose from a variety of materials but the popular ones are wood, PVC, and MDF. They come in different patterns, colors and designs so pick one that you like.
How to Cut Baseboard Outside Corners – Step by Step
The Different Kinds of Joints Involved
There are different kinds of joints involved in making baseboard corners. Knowing them helps make the job easier. The different kinds of joints involved are:
1. Miter Joint
A miter joint has a 90-degree corner. It can be made by joining two beveled cut pieces of the board at 45 degrees angles. It can be used to make corner angles or hold carcasses.
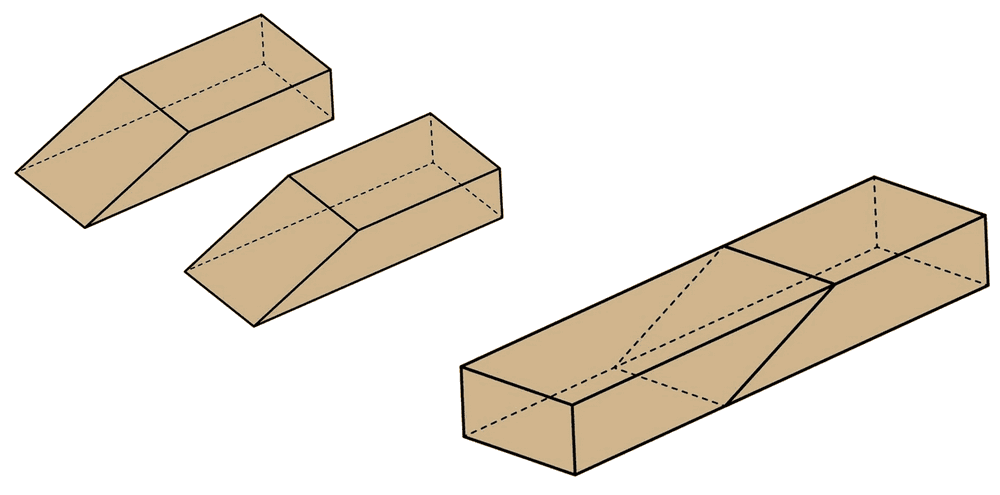
2. Scarf Joint
A scarf joint is a horizontal joint. You need to have two tapered cuts of baseboard which you join at the tapered ends to make this joint. You can use it to lengthen material if your given measurement is too short.
3. Coped Joint
A coped joint is made by joining one butt end of a piece of board, with another piece whose joining end is made specifically for them to fit. There should ideally be no gap in between this fitting. It helps fit skirting when walls aren’t square to each other.
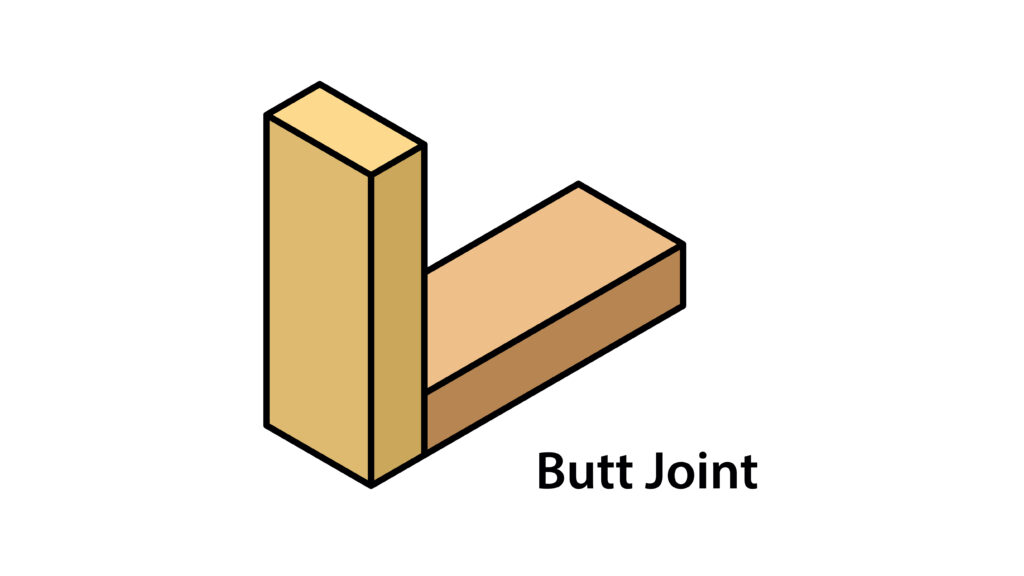
4. Butt Joint
A butt joint is the simplest of joints to take. Simply take two cuts of the board and join them together in a uniform manner. You can use it to widen boards or make frames.
Now that you have some knowledge on which joints are used to make outside and inside corners, let’s move on to the step-by-step guide to cutting an outside corner.
The First Step
The first step in cutting an outside corner is by creating a scarf joint. Ideally, you would find the longest wall in your room and cover its length with a baseboard.
Ideally, you should have measured and cut the baseboard at a 90-degree angle to ensure that it is the right fit. In the event you need more than one board for your wall, you should join the two together before proceeding forward.
If you cut the boards perpendicular and place them at a stud location, your scarf joint will be sturdier and stronger.
Here’s how to make the perfect scarf joint for this step:
- Take two pieces of baseboard that you have already cut perpendicularly.
- Put the first board in position and mark a 45 degree cut with a pencil.
- At the end of the first board, use your preferred miter saw to make a 45-degree laceration. Use sandpaper to smoothen out the edges.
- Use nails to mallet the baseboard into place in the wall. Do not over-sand the board.
- Taking the already placed board as reference, measure the other board and cut this one accordingly.
- In case you notice a bend or bow in the board, cut it at a 90-degree angle at the ends.
- Now you must glue the joining parts and fix them together firmly.
- To secure the scarf joint, take one nail into the top of the joint, and use the other to hold it to the floor by running it through the angle.
Your scarf joint is now secure, and we move on to make an outside corner.
The Second Step
Again, measuring and placing the board around your room is a prerequisite for this step. For this step, you will need a try square to help you out. If you do not have a try square you can easily make it yourself.
Once you have everything you need and step 1 already taken care of, you can start with:
- Measure and install the boardings all along with the floors of your room till you reach the outside corner.
- When you reach a corner, set a piece of boarding so it extends past the point where it’s supposed to meet the other piece of the corner.
- Mark it at this point to have a point of reference for your cut. You can use a try square to aid you.
- Use a miter saw to cut the baseboard at a 45-degree angle, or a perpendicular if you are using the other method for the cut.
- Once you have done this with one baseboard piece, repeat it with the second one.
- You can use wood glue on the joining end of the two baseboards before joining them and installing them.
How to Make a Try Square?
Making a try square requires a miter saw, some wood, glue, and nails. Here’s how to make one:
- Take two scrap pieces of wood that are parallel and smoothened out. Cut them to a desirable handheld length with a compound miter saw.
- Depending on the width of your wood, cut a mortise into one piece of wood. You can use a chisel to take the excess shavings out.
- Use the second piece of wood to cut out a beam that will be placed in the mortise of the first piece. You will have to measure the thickness to see if the two pieces fit.
- Use wood glue to adjust the beam into the mortise. Next, take a wood screw and screw it into place in the mortise area.
- Finally, take the square and adjust it to make the perfect right angle and trim the sides.
You can make a try square with all sorts of miter saws, compound miter saws, mini circular saws, and even hand saws. It is fairly easy to make tools, which are very important in woodworking.
A try square helps you measure and mark the baseboards for outside corners. Once you have marked your angles, you can start cutting the baseboard accordingly.
Using the Miter Saw
The miter saw comes in whenever you have to cut the baseboard and make usable pieces out of it. There are two bevel settings most people prefer to make cuts on, 0-45 degrees and 0-90 degrees.
Measurement is the most important part of the cutting process.
Measure twice and cut once is the age-old saying.
You want to make the most of the wood you have and be efficient.
Here are the basic steps of using a miter saw for cutting baseboard:
- Measure and mark the baseboard for the cut you need to make. Take into account the thickness of the blade since you want to make the baseboards join perfectly.
- Clamp the board into place with the miter saw clamps. You can use the knob to adjust how tightly you secure the board in place, make sure to keep it at least half a foot from the blade on either side.
- Make the bevel adjustments on both levels for the angle you are looking to make the cut at. Most people make the cut at a 45-degree angle or 90-degree angle.
- The cutting motion to make a cut is forward to back. You will face less resistance on the board with this. Do not lift the blade until it has stopped moving completely.
- Always look to position the cut well as this will help with leaning the blade on either side to make angled cuts. To do this, lean the saw towards the stable surface.
- Make the cuts to your baseboard molding accordingly and get the perfect corners. Inside corners are made with a coped joint, outside corners with a miter joint or butt joint.
Safety Measures When Using a Miter Saw
Using a miter saw can be dangerous if you do not take safety precautions.
To ensure a safe project, here are some safety measures to take into consideration:
- Wear a pair of safety glasses. When cutting the baseboard, dust or small pieces of the board can enter the eye and cause irritation. In serious cases, the damage is a lot.
- Wear a dust mask to ensure you can breathe perfectly throughout the cutting.
- Make sure the miter saw is placed on a stable and secure surface. It should be perfectly balanced so it does not move during the cutting.
- Clamps, if available, should be used to keep the baseboard in place when making the cut. This will minimize the risk of any accidents.
- Always make sure the blade is not running when repositioning the board as it could harm you and damage the cut baseboard.
Inside Corner vs Outside Corner – What’s the Difference?
Although an inside corner might look like an outside one that is just inverted, that is not the case. Inside corner joints are made with coped joints and not butt joints. This is because, unlike the butt joints, coped joints have a slight gap between the two pieces of board.
The Difference Is in The Make
To set an inside corner in place, you can trim one of the boards whilst holding the other pressed against the floor. This would ideally make the two mating pieces fit together better. The cut baseboard is effectively trimmed to make sure the corner fits.
An inside corner is relatively easier to make as opposed to its outside counterpart.
One thing that you should know is that the bevel cut for this is only at 45 degrees and cannot be made in two ways like we did the outer corner.
Tips and Tricks to Make The Perfect Baseboard Outside Corners
When using a miter saw to cut baseboard corners, some tips and tricks can come in handy to get the perfect boards.
Here are some to take into consideration:
- Always pick the right tool to get the cutting job done, most miter saws are versatile enough to use on baseboard projects.
- Measuring the angles and lengths twice can go a long way. Since there’s no going back once you have cut a piece of baseboard, make sure to measure it right.
- When trying to cut baseboard, make sure the bevel adjustments have been made correctly. It will get straight angled cuts in one piece without wasting excess board.
- Installing the baseboard on walls is also very tricky. Prep the surface beforehand to make sure you don’t have uneven gaps to fill in later.
- When making a joint for the baseboard, measure it correctly and use wood glue to hold the pieces together. You can nail the joint in later as well.
- Trimming the molding is an essential part of making sure it will fit straight without bending. You can use saws or any other tool to trim the corner and later fill in gaps.
Baseboard Outside Corners – Frequently Asked Questions (FAQs)
The most important thing to do is to follow instructions carefully and make sure you have the required tools. Additional tips and tricks along with the FAQs help you understand where you could do better. They also help you relate to others who struggled just like you.
What happens if there’s a gap between the baseboard and the floor?
Sometimes cutting baseboards and crown moldings can be hard. There are gaps or bends in the wood that need to be filled out. Using a wood filler or twinning the edges to make it less bent is always a good solution.
How does the type of wood used affect the skirting?
The type of wood chosen for the baseboard is very important. Wood types depend on the humidity, moisture content, heat, and other climatic conditions of the area where they will be used. Unsealed walls or pipe leakages could also spoil the baseboard.
At what angles can you cut outside corner boards and join them?
Most people make outside corners by cutting 45-degree angles and joining the two pieces of baseboard together. However, there are others who make the corner using perpendicular cuts they join to make squares. You can easily do both with a miter saw.
How are baseboards installed once they have been cut?
You can use nails to hold the baseboard in place when you are installing them. Some people also use wood glue to attach them to the wall and floor better. After the baseboards have been attached, you can paint over them to make them look even.
What is the difference between crown molding and baseboards?
Both baseboards and crown molding are decorative items that you put on either end of the wall. The baseboard is applied to the end near the floor, covering the area where the wall meets the floor.
Crown molding is the decorative material used to cover the edges of the wall where it meets the ceiling. Both are sometimes referred to as skirting.
Does the kind of miter saw you use make a difference?
Any kind of miter saw would make the cut. You can use electrical ones if you are used to them, miter boxes work just as well. The main goal is to make sure the angles and the cuts align. You can achieve the same results with any kind of miter saw.
If the baseboard is cut wrong, can I fix it?
One of the most important things is to cut the baseboard right with the miter saw. To avoid getting a wrong cut, measure the board and double-check it.
Once you’ve cut it there is no going back so you have to be careful.
In case you cut the board too short, you can always join two pieces together with a scarf joint to make it longer. However, you still want to make the most of it in one go.
What are the best tools to get good measurements?
The easiest way to get the best measurements is to use a measuring tape and a try square. This can help you see if the angles are right and if you have the scale right too. Sometimes you have to take into regard how saws have blades of different thicknesses.
What is the general rule of thumb for best measurements?
As a rule of thumb, leave a margin of error on the initial measurement in the width of the blade. This will make sure that the area the blade is cutting will not shorten the intended length. You can even trim it later in case it’s just a bit longer.
The Takeaway
Cutting outer corners on a baseboard with a miter saw is not only effective but easy as well. The main thing to focus on is knowing the type of joints e.g. a butt joint involved and how to make them.
Different types of miter saws can be used to achieve the same result.
There are different types of angles involved when cutting baseboard with a miter saw. Most commonly 90 degrees and 45 degrees angles are used for outer corners. Different tools like try squares, measuring tape, etc help make more accurate corners.